


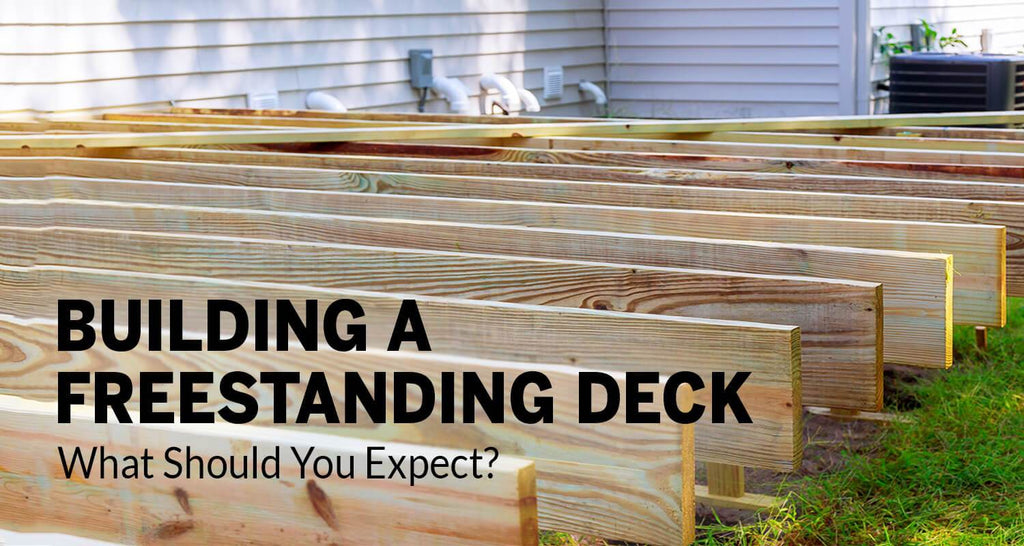
Building a freestanding deck can be an attractive option for many homeowners or even renters. But what is a freestanding deck anyway?
A freestanding deck, simply put, is a deck that isn’t attached to another structure. It can be built right next to a house, almost like it’s attached to it, but it will still be self-supporting. This kind of deck can offer many options, and it can be simpler to build than a deck that’s attached to an outer wall of a house. You won’t need to worry about a ledger board, which means you won’t have to make modifications to your house’s exterior in order to accommodate a deck.

A freestanding deck might seem like it’s extra work. However, there are good reasons as to why freestanding decks are preferable for a lot of people. In this article, you’ll see the pros and cons of having a freestanding deck on your property, and you’ll also learn the basics of building a freestanding deck.
- I. Preparing for Building a Freestanding Deck
- II. Tools for Building a Freestanding Deck
- A. Protective Equipment
- B. Site Preparation
- C. Lumber and Lumber Cutting
- D. Building the Framing and Deck
- III. Decking Materials You Can Use
- IV. Freestanding Deck Designs
- V. Building a Freestanding Deck
- 1. Draw a Plan
- 2. Prepare the Site
- 3. Position the Footing Holes
- 4. Dig Footing Holes
- 5. Secure Joist Posts and Beams
- 6. Build the Frame
- 7. Install the Newel Posts
- 8. Lay Down Decking Boards
- 9. Install the Hand and Base Rails
- VI. Maintaining a Deck
TL;DR
- In this article, you'll learn the benefits and drawbacks of having a freestanding deck on your property, as well as the fundamentals of building one.
- Make sure there is enough room in each corner of the area for one newel post. This is to allow for a newel post to be installed in the exact center of that side of the deck.
- Dig the footing holes with a post hole digger.
- Place the post caps on top of the posts.
- Beams and joist posts must be secure. You'll be able to install the joist posts once each post bracket is in place.
- Place the newel posts in place. The newel posts should be ready to be installed at this point in the process.
- Attach the newel posts to the outer joists with coach screws.
- Place a newel board in each notch to ensure the board is in the correct position.
- Repeat the process until you have all of the decking boards you require.
- Attach the boards to each other and secure them with two screws in each fixing point.
- Hand and base rails can be installed. Now is the time to prepare the hand and base rails for installation.
- Now, in the corner where a newel post and the deck surface meet, place a spacer.
- Repeat this process until you've finished installing balustrades around the deck's perimeter.
Preparing for Building a Freestanding Deck
Before you get started on building your freestanding deck, there are a couple of important things to consider. Freestanding decks, as the name suggests, are decks that are built to be self-supporting and independent from another structure, such as a house. Even so, it’s always best to look into your area’s building codes and ascertain whether or not you need to secure permits before you start building.

A freestanding deck is a good go-to if you’re facing some restrictions or issues that prevent you from building an attached deck. There are several things that can prevent you from building an attached deck, making a freestanding deck a viable option.
Building Codes, Permits, and Taxes
Before you even draw up plans for your freestanding deck, check out the building code in your area. This is because it might require you to get a permit if you’re building a deck that’s higher than 30 inches, has an area bigger than 200 square feet, and is attached to a building. A low freestanding deck can allow you the luxury of an outdoor living space without having to apply for permits. However, you can also choose to build a higher and larger freestanding deck if you can get the permits sorted out.
![]()
Additionally, an attached deck can affect your property taxes. After all, a deck can be considered to be a living space. An attached deck can be considered to be additional square footage that makes your residence larger. This can therefore be used as a reason to raise your taxes.
A freestanding deck might be your best choice if you’re not allowed to build new attachments to your house. Bear in mind that you might still need a permit even if you make your deck a temporary structure. Make sure that you have this covered, because building structures without permits or in violation of building codes can lead to a lot of problems for you in the future.
Renting vs Owning
Preparations for your freestanding deck don’t just entail securing permits and checking building codes. If you’re renting your property, it’s best if you discuss your options with your landlord. You might not be permitted to build a deck at all, but if you are, make sure to get your landlord’s agreement and permission in writing.
It’s vital to decide early on whether you’ll be building a temporary or permanent deck. If you own the property, you’re free to decide between the two.
What is Your House Like?
Is a freestanding deck indeed the best choice? It often is, especially for people whose houses have a stucco or brick exterior. Also, if your house is older, its walls might no longer be strong enough to easily support a significant addition like a new deck.
You can still build a freestanding deck right next to a house wall, so you can still have doors that open right up to the deck. However, in this case, make sure to still dig footing holes even though the deck is freestanding.
Remember that doing your due diligence is the very first step in building any kind of deck. Research is important, especially when it comes to building codes and regulations in your area.
Tools for Building a Freestanding Deck
Like many other construction projects, building a deck requires a number of tools and materials. After all, a lot of work goes into projects like this, and a lot of the tasks require the use of specific tools. You will likely and inevitably have to use a wide assortment of implements, and you might not be able to build a deck from the ground up with just your basic set of tools from the garage.
However, for a project like this, hand and power tools will likely suffice. You probably won’t need to use heavy machinery, especially since you won’t need to excavate for a new freestanding deck. If you’re missing a few tools, however, check out Engineer Warehouse to see if you can find what you need there.
Below is a list of the tools and materials you’ll probably need over the course of building a freestanding deck:
Protective Equipment
- Safety goggles

- Gloves
- Dust mask
Site Preparation
- Mallet
- Twine

- Tape measure
- Measuring wheel
- Spade
- Wooden pegs
- Spray paint
- Posthole digger
- Rake
- Gravel
- Concrete tubes
- Quick-drying concrete
- Cement mixer

- Calculator
- Weed control fabric
- Builders square or angle finder
Lumber and Lumber Cutting
- Decking end grain protector
- Decking boards
- Beams
- Joists
- Miter saw
- Jigsaw
- Pencil
- Sandpaper
- Paintbrush
Building the Framing and Deck
- J-bolts
- Post brackets
- Hand saw
- Clamp
- Drill
- Impact driver
- Socket set
- Pegs
- Post support
- Spirit level

- Laser level
- Coach screws
- Deck screws
- Combi square
- Spacers
- Spindles
- Handrails
- Base rails
- Newel posts
Decking Materials You Can Use
You have a lot of choices of decking materials, and each one has its own pros and cons. Typically, deck boards are lumber, but you also have other options like wood alternatives or metal.
Before you make your choice, you’ll have to consider factors like insect resistance, appearance, durability, cost, and workability. Here are some decking material options that you might want to look into so you can make an informed choice:

Freestanding Deck Designs
A freestanding deck can allow you a lot of freedom in terms of design. Because it is a self-supporting structure, you can build it anywhere on your property. You can build it next to your house so it can function much like an attached deck without the attachment. It can also be placed further away from your house to serve as a sort of oasis in your yard.
Furthermore, freestanding decks are great for things like above ground pools. You can build a freestanding deck so that its surface can be at the same height as the pool’s rim, thus providing your pool with a convenient deck.

You can also choose to add features like stairs, railings, posts, planters, and more. If your freestanding deck is low to the ground, you might not need to add railings or stairs. However, the taller your deck is, the better it is to have railings to keep people safe.
Building a Freestanding Deck
Once you’ve gotten whatever building permits you need, and you’ve chosen a site on which to build your deck, you can start the process of construction. Building a deck -- any kind of deck -- takes a lot of planning, careful measurements, time, manpower, and money. Thus, it’s important to know what you should expect going forward.
Below is a guide to building a raised freestanding deck. It is by no means definitive, and you might have to make some changes to the process laid out below to fit your preferences and circumstances. However, this guide will help you learn what goes into the process of building a freestanding deck.
Draw a Plan
Before you break ground on your new deck construction site, it’s definitely vital to make accurate plans. Let’s break this step down into manageable parts:
Measurements
Go out to your yard and take measurements. Measure the distance from your house to the edge of your property, measure the windows and doors, and figure out the dimensions of your house. To accomplish this, you can use the Calculated Industries Digiroller Plus III 6575, an easy-to-use tool that can make taking large measurements faster and simpler. You can also check out our list of the top rated measuring wheels for sale.

Take note of trees, shrubs, electrical lines, outlets, vents, and valves as well.
These measurements will all help you figure out your site plan, which will help you layout everything that will affect the construction of your deck. You can keep things simple by just making a sketch, but if you want a more detailed site plan, you might have to do a scaled drawing.
Other than taking measurements, make sure that your construction site doesn’t have pipes or anything of the sort underground.
Identify Details
Building a deck relies on a variety of details, all of which you need to keep track of. A detailed deck plan can help you with this. Detailed plans will allow you to figure out how much lumber you need, and how long each piece and board needs to be. Thus, you can save money by buying the amount of lumber you’ll need.

You also need to create a drawing that details the aerial view of your deck, as well as the dimensions of the joists, beams, posts, and the spacing between these parts. It’s also best if you draw the front and/or side elevation of the deck, which you can do by hand or with the help of computer-assisted drafting (CAD) software.
Prepare the Site
At this point, you should already know the measurements and dimensions of your deck, as well as the exact spot you’ll be building it on. Take your wooden pegs and mark the corners of the space your deck will be occupying. Tie a piece of twine on one peg and roll it out to the other pegs so you’ll form a square or rectangle. Use a builder’s square or an angle finder to see if the twine forms perfect right angles.
Make sure that each corner of the area has enough space for one newel post each. This means that the corner joist posts shouldn’t be nestled right into the corners formed by the outer joists. There should be a space in between the corner posts and the outer joist corners.
Next, cut and dig out the sod in the area indicated by the twine. Don’t dig a hole; just make sure that the area is completely free of grass.
Position the Footing Holes
It’s important to note that the posts will have to be positioned in such a way that they’ll leave space for newel posts. You’ll notice that the column of footing holes in the middle isn’t actually positioned right down the middle of the deck area; instead, it’s a bit off to the right.
This is to accommodate a newel post that needs to be positioned right in the middle of that side of the deck. Thus, instead of being positioned right where that newel post is, the joist post is positioned so that it’s right next to the newel post. The other joist posts are aligned in the same column so they can support the beam.
The corner joist posts should make space for the corner newel posts as well. The newel posts should end up right at the corner of the deck, as seen in the illustration below:

Dig Footing Holes
Mark out the position of the deck’s footing holes with marking spray paint. You can use marking paint like the SMI-Carr Yellow Inverted Marking Paint. Make sure that the footing holes are spaced evenly.
Use a post hole digger to dig the footing holes. The diameter of these holes should be at least three times the width of the posts you’ll be using. Cut the cement tube into shorter tubes, and these shorter tubes will go into the footing holes. Each hole should have a layer of gravel at the bottom in order to facilitate water drainage. Don’t forget to check if the cement tubes are level.
Once the gravel is in place, pour the wet concrete into the hole. Take a spare piece of wood to screed the excess concrete off the top. This will result in a smooth surface.
Next, push a J-bolt into the concrete, with the bolt end sticking up and out. These J-bolts will determine where the joist posts will be positioned, so make sure to measure and mark the positioning carefully. Make sure to put a J-bolt in every footing hole.
Wait for the concrete to dry, then secure the post brackets onto the exposed bolt end of the J-bolts. Put the post caps in place.
At this stage, you’ll be able to spread out your weed control fabric, which prevents the growth of weeds under your deck. Make sure that the fabric covers the entire area. If you need to, cut holes into the fabric to accommodate the post brackets. Once the fabric is in place, you can spread the gravel over it to cover it completely.
Secure Joist Posts and Beams
With each post bracket in place, you’ll be able to install the joist posts. Put a post in a bracket, right on the post cap, and make sure that the post is plumb. Use your spirit level or laser level to make sure.
Once the post is plumb, screw or nail the bracket into it at all possible points. This will ensure that the post is securely attached to the brackets.
You can now install the beams. Put one beam on one side of the middle row of joist posts, and another on the other side. Don’t forget to check if the beams are level. Then, clamp the two beams together, making sure that they’re securely in place. Screw the beams into each of the three posts.
Build the Frame
Take the lumber for the outer joists and use a miter saw to cut them to the right length. When cutting wood, don’t forget to use a decking end grain protector on the cut edges. This protects the wood from rot and other kinds of damage. Remember to sand the cut edges down first before applying the sealant.

You can use one side of the joist posts to mark and indicate the height of your deck. You would also need to determine the drop on the deck for water run-off. For this, you can use the Pacific Laser Systems PLS 180G Cross Line Green Laser Level Kit, which comes with a green laser that’s perfectly visible in the sunlight. You can then mark the drop on the posts as well.
These marks will tell you where your outer joists should go. You can now use a clamp to secure the joists in place, one by one. First, drill holes into a joist to make way for coach screws. These screws will make sure that the outer joists are securely attached to the posts.

You can now install the inner joists. Use the miter saw to cut them to the right size, and make sure to sand and seal the cut edges as well. Determine where the inner joists should be and mark them on the surface of the outer joists. Two coach screws should be enough to secure the inner joists and fasten them to the outer joists.
Install the Newel Posts
At this point in the process, the newel posts should be ready to be installed. They should be placed at even distances, the length of which will depend on the dimensions of your deck. Make sure that you pick one side of the deck to accommodate the entrance. Two newel posts should flank either side of this entrance.

Use coach screws to attach the newel posts to the outer joists. Put newel posts in the corners first, after which you can place the rest.

Lay Down Decking Boards
You can now start laying down the decking boards, starting with the outer ones. Cut the decking boards to the correct length, and don’t forget to sand and seal the cut edges on these boards as well. Place a board along the outer side of the deck, right over the outer joist. Mark out the spots where the newel posts are supposed to be because these will be where you’ll cut out notches to accommodate the same posts. Use a jigsaw for this particular task.

Lay down the board in its correct position, with a newel board in each notch. Find the fixing points, because these are where you’ll drive in the screws to secure this board to the outer joists. Use two screws at each point.
Repeat this process as needed until you have all the decking boards you need. Attach the boards and keep them in place with two screws in each fixing point as well. Use spacers in between each decking board to maintain a consistent gap between all boards.
Install the Hand and Base Rails
You can now take the hand and base rails and prepare them for installation. First, cut them to size, then sand and seal the cut edges. Take a timber spacer, then attach the spindles to each base rail with screws. The timber spacer will allow you to space the spindles out evenly.
![]()
A spacer can be a block of wood cut to the right size.
Now, put a spacer in the corner where a newel post and the deck surface meet. You’ll need to put another spacer in the corner opposite this one. You can now put the baluster over those spacers. Drill a pilot hole into the base rail and securely attach the rail to the newel post.
In the figure below, you’ll see where the spacer should be positioned:
Next, attach the hand rail to the newel post with screws as well. Repeat this process until you’ve put up balustrades around the perimeter of the deck.

A handrail attached to spindles.
And with that, you’ve built yourself a freestanding deck. You can add furniture, planters, or even stairs if the deck is too high.
Maintaining a Deck
Because a freestanding deck is typically found out in the yard, exposed to the elements, it’s going to need careful maintenance. If you use the right materials and take the right precautions, you’ll be able to build a deck that can last decades.

Even so, deck maintenance is still vital. You’d need to have it inspected regularly since regular inspections can help you catch problems like termites and rot before they get worse. Depending on the type of materials and lumber you used to build the deck, you might have to apply a sealant to the deck regularly.


